
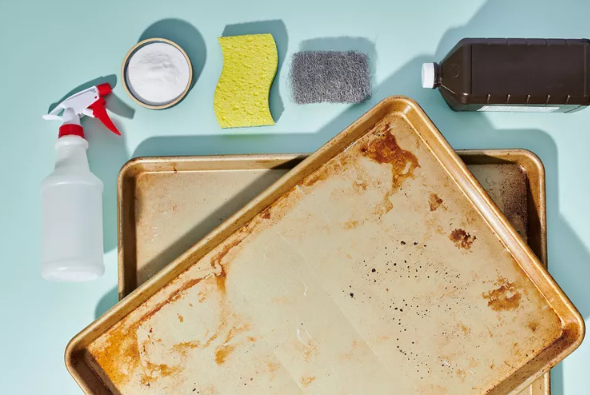
People usually notice baking trays only when they stop looking clean. At first it’s just a darker patch near the corners. Then food starts sticking where it never did before. Eventually the tray feels greasy even after washing. By that point, most people assume the tray is “old” and start thinking about replacement.
In reality, most baking trays fail early because of cleaning habits, not because of heat or usage. This is true in home kitchens, and it’s even more obvious in bakeries and food operations that source trays from a baking tray manufacturer and run them through hundreds of cycles. The tray itself is rarely the problem. The way it’s cleaned usually is.
Cleaning baking trays properly is less about finding a miracle method and more about understanding when to stop doing things that quietly cause damage.
Essential Tools and Supplies You’ll Need

One of the easiest mistakes to make is treating all baking trays the same. They are not. A non-stick tray reacts very differently to friction than a bare aluminum tray, even if they look similar on the rack.
Non-stick trays are built to release food, not to tolerate pressure. Once the coating is scratched, even slightly, every future bake makes that damage worse. Soft sponges, silicone scrapers, and cloths that glide rather than grip are the only tools that make sense here. Anything rough enough to “feel effective” is usually doing harm.
Metal and aluminum trays, especially those produced by a wholesale baking tray factory, can handle more contact. But they are not indestructible. Fine scratches trap oil. Trapped oil darkens. Darkened areas bake faster and collect even more residue. This is how trays end up looking permanently dirty even when they are technically clean.
Ceramic and enamel trays sit in between. Their surfaces are harder, but their finishes are thinner at edges and corners. That’s where damage starts.
As for cleaning agents, many professional kitchens rely on simple materials. Baking soda, vinegar, lemon, and salt are predictable and controllable. They work because you can adjust how they behave. Commercial cleaners work too, but only when used correctly. The problem is that they make it easy to overdo things.

Quick Daily Cleaning Method for Light Use
If there is one habit that matters more than any other, it’s cleaning trays before they fully cool.
The ideal moment is when the tray is no longer dangerously hot but still warm to the touch. Usually that’s somewhere around 10 to 20 minutes after baking. At this stage, grease hasn’t fully solidified and sugars haven’t finished bonding to the surface.
Water temperature matters more than people think. Cold water turns liquid fat into wax. Very hot water can stress non-stick coatings and warp thinner trays. Warm water does the quiet work of loosening residue without forcing anything.
Another small habit that causes big problems is letting trays air-dry without a proper rinse. Soap residue mixed with microscopic food particles creates a film. That film is invisible at first. After the next bake, it isn’t. Over time, it becomes the layer people blame on “burn marks.”
A tray that feels smooth and neutral after washing usually needs nothing more. A tray that feels sticky, uneven, or slightly rough is already asking for more attention.
Baking Soda and Vinegar Method for Moderate Burnt-On Stains
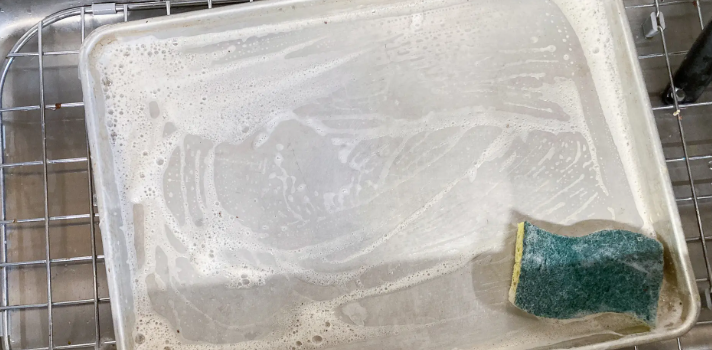
When residue survives normal washing, baking soda and vinegar are usually enough, if used patiently.
The baking soda paste should be thick. If it runs, it’s too thin. The goal is not to scrub immediately but to let the paste sit where the residue is strongest. The fizzing reaction that happens when vinegar is added is often misunderstood. It’s not blasting stains away. It’s loosening the grip that baked-on grease has on the tray surface.
For lighter buildup, half an hour is often enough. For darker stains that have been through multiple baking cycles, several hours or overnight is more realistic. Trying to rush this step usually leads to aggressive scrubbing, which causes more problems later.
This approach is commonly recommended during testing by OEM baking tray manufacturers because it removes residue while preserving surface integrity. Force is rarely the solution.
Natural Lemon and Salt Scrub for Grease and Light Discoloration
Lemon and salt are best used when a tray is clean but doesn’t look clean.
This method works well on metal trays and poorly on non-stick ones. The salt provides mild abrasion, while lemon juice breaks down grease films and helps lift light discoloration. Fine or medium salt is enough. Coarse salt scratches too easily, especially on aluminum.
This is not a solution for heavy carbon buildup. It’s more like a surface reset. Many baking tray suppliers suggest it as occasional maintenance rather than regular cleaning.
Specialized Care for Non-Stick Baking Trays
Non-stick trays don’t fail suddenly. They fail gradually.
The first signs are subtle. Food releases less easily. The surface feels slightly tacky after washing. Color becomes uneven, especially near edges. These are not cosmetic issues. They are signals that the cleaning routine is too harsh.
Soaking time should be limited. Water should be warm, not hot. Abrasive pads and stiff brushes cause damage that cannot be undone, even if the tray still works for a while afterward.
When discoloration appears, gentler methods work better than scrubbing. Longer soaking combined with mild degreasing often improves appearance without cutting into the coating. Buyers working with custom baking tray manufacturers usually see longer tray lifespans when cleaning policies prioritize restraint over speed.
Heavy-Duty Deep Cleaning for Severely Burnt Trays
Some trays reach a point where residue is no longer just grease but carbon.
In these cases, baking soda paste works best in layers. One application rarely solves the problem. The paste needs time to soften residue gradually. Vinegar is more effective after the paste has done some work, not before.
Sugar-based burns are the hardest to deal with. Caramel, syrups, and cookie residue bond aggressively to hot metal. These stains often require repeated cycles of soaking and gentle scraping.
It’s also important to know when to stop. Heat discoloration that doesn’t affect food release or flavor is often permanent. Many wholesale baking tray manufacturers consider these trays fully serviceable. Chasing a spotless look can shorten tray life unnecessarily.
Pro Tips to Prevent Future Buildup
Most buildup starts during cooling, not baking.
Adding warm water to a tray as soon as it’s safe prevents residue from setting. This simple step reduces future scrubbing more than any cleaner. Over time, non-toxic methods outperform harsh chemicals because they cause less surface fatigue and leave fewer residues behind.
Cleaning frequency should match usage, not habit. Trays used daily need consistent light cleaning. Trays used occasionally benefit from prompt soaking rather than deep cleaning later.
Parchment paper and silicone mats reduce direct contact and are widely used in operations supplied by professional baking tray manufacturers. They don’t eliminate cleaning, but they slow down damage.
Common Mistakes That Make Cleaning Harder
Many “stubborn” stains are created after baking, not during it.
Cold water sets grease. Excessive heat damages coatings. Scrubbing before soaking drives residue deeper into scratches. Mixing incompatible cleaners reduces effectiveness and can create safety issues.
Avoid combining vinegar with chlorine-based products. Avoid abrasive powders on coated trays. Cleaning should preserve function, not quietly destroy it.
Conclusion
Cleaning baking trays well is about timing, restraint, and understanding materials. Perfect appearance is not the goal. Consistent performance is.
For kitchens sourcing from a or OEM baking tray factory, proper cleaning protects both product quality and operating costs. When cleaning methods respect the tray, trays last longer, behave more predictably, and stay useful long after their color changes.